Decorating a customized cake is an art that can bring joy and delight to both the baker and the recipients of the delicious treat.
Whether you’re a beginner or an experienced baker, creating a beautifully decorated cake can be a rewarding and fulfilling experience.
In this step-by-step guide, we will explore the various techniques and tools required to decorate a birthday cake like a professional pastry chef.
So, let’s dive into the wonderful world of cake decoration and unleash our creativity!
Step 1: Preparing the Cake
When it comes to baking a birthday cake in Singapore from scratch, you have numerous flavor options to choose from, such as vanilla, chocolate, red velvet, lemon, or even more exotic flavors like carrot or coconut.
Ensure you have all the required ingredients, including flour, sugar, eggs, butter, baking powder, and flavorings. Follow a reliable recipe and accurately measure the ingredients to achieve the best results.
Once your cake is baked, let it cool in the pan for about 10 minutes before transferring it to a wire rack. Allow it to cool completely before proceeding with the decorating process. A warm cake can cause the frosting to melt and create a sticky mess.
Step 2: Leveling and Layering
Leveling the cake is essential for even frosting distribution and a professional appearance. Use a serrated knife or a cake leveler to trim the domed top of the cake to make it flat and even. Be gentle and steady while cutting to maintain the cake’s structural integrity.
For layered cakes, decide how many layers you want and mark the sides of the cake with toothpicks or a cake marker to create even layers.
Carefully cut the cake using a serrated knife or a cake leveler. Take your time and use a sawing motion to get clean, straight cuts.
Step 3: Crumb Coating
To achieve a clean and polished look, apply a crumb coat. A crumb coat is a thin layer of frosting that locks in any loose crumbs and provides a smooth surface for the final layer of frosting.
Start with a small amount of frosting and spread it thinly across the entire cake, using an offset spatula to avoid contaminating your main batch of frosting.
Allow the crumb coat to set for about 10-15 minutes before moving on to the final frosting layer. You can speed up the setting process by placing the cake in the refrigerator.
Step 4: Choosing the Right Frosting
Choosing the right frosting can significantly impact the taste and appearance of your cake. For a classic, creamy texture and a wide range of flavors, buttercream is an excellent choice.
Cream cheese frosting pairs wonderfully with carrot and red velvet cakes. For a more sophisticated and smooth finish, ganache is an ideal option.
Fondant, while not as flavorful as buttercream or ganache, allows for intricate decorations and a flawless finish.
Experiment with different frosting recipes and flavors to find the one that perfectly complements your cake’s flavor profile.
Step 5: Frosting the Cake
Begin frosting the cake from the top and work your way down to the sides. Using an offset spatula, apply a generous amount of frosting on the top and spread it evenly in a circular motion, working toward the edges. Apply additional frosting on the sides and use the spatula to create an even layer all around.
For a smooth finish, dip the spatula in warm water and gently glide it over the frosting to level and smooth it out. Keep a bowl of hot water nearby to clean the spatula periodically.
Step 6: Piping Techniques
Piping adds a touch of elegance and intricacy to your cake design. Depending on the tip you use, you can create various patterns and designs.
To pipe, fill a piping bag fitted with your desired tip with frosting, and twist the top to secure it. Squeeze the bag gently to release the frosting.
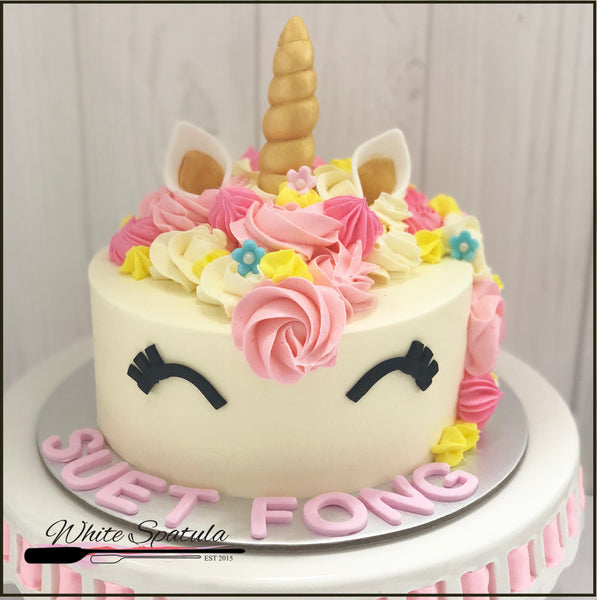
For borders, use a round or star tip to create a continuous line of frosting around the edges of the cake. For flowers, use petal tips in various sizes and pipes the petals one by one, layering them to form beautiful blooms.
Practice piping on a piece of parchment paper before attempting intricate designs on your cake.
Step 7: Using Fondant
Fondant allows you to create a smooth, flawless finish on your cake and serves as a canvas for elaborate decorations.
Knead the fondant until it becomes soft and pliable. Lightly dust your work surface with powdered sugar or cornstarch to prevent sticking.
Roll out the fondant using a rolling pin, rotating it frequently to achieve an even thickness.
Gently lift the rolled-out fondant and drape it over the cake. Smooth it out with your hands, starting from the top and working your way down the sides. Use a fondant smoother to eliminate air bubbles and creases.
Step 8: Adding Edible Decorations
Edible decorations can take your cake to the next level in terms of visual appeal and taste. Fresh fruits like strawberries, blueberries, or raspberries add a burst of color and freshness.
Edible flowers, such as roses, violets, or pansies, create an elegant and sophisticated look. Chocolate shavings or curls lend a touch of decadence, while sprinkles and candy can add a fun and playful element.
Before adding the decorations, consider the flavor compatibility and ensure that they adhere well to the frosting or fondant.
Step 9: Personalizing with Writing and Messages
Writing on the cake is an excellent way to make it more personalized and suitable for the occasion. To add writing or messages, fill a piping bag fitted with a small round trip with a contrasting color of frosting. You should practice writing on a piece of parchment paper before writing directly on the cake.
Keep in mind that less is more when it comes to writing, and legible, neat handwriting makes for an elegant touch.
Step 10: Final Touches and Presentation
The last step involves adding the final touches to make your cake truly eye-catching. Dust the cake with powdered sugar to give it a subtle, snowy appearance. Colored sprinkles or edible glitter can add a touch of sparkle and magic to the overall presentation.
Consider the cake’s surroundings and choose an appropriate cake stand or platter that complements the design and theme.
Ensure the presentation is clean and polished by wiping off any smudges or excess frosting from the cake board or platter.
Conclusion
Decorating a customized birthday cake is an art form that combines creativity, skill, and passion. With these step-by-step instructions, you are equipped to create beautiful and delicious cakes that will leave a lasting impression on your friends, family, and guests.
Remember to be patient with yourself and enjoy the creative process. So, roll up your sleeves, grab your tools, and let your imagination run wild as you embark on your cake decorating journey. Happy decorating!